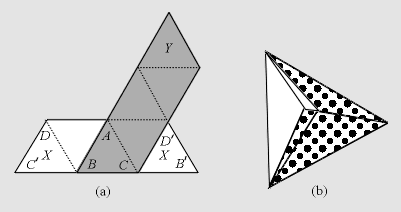
Figure 14
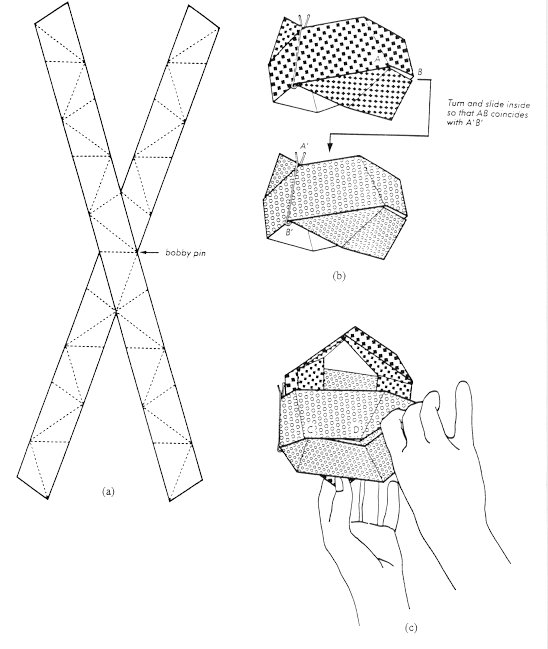
Octahedron: Begin with a pair of overlapping strips held together with a
paper clip, as indicated in Figure 15(a)
(with the color visible). Fold
these two strips into a double pyramid by placing triangle a1 under
triangle A1, triangle a2 under triangle
A2, and triangle
b under triangle B. Secure the overlapping triangles b, B
with a paper clip to produce the configuration shown in Figure 15(b).
Repeat this process with the other two strips. Then place the second pair
of braided strips over the first pair, as shown in Figure 15(c).
When doing this, make certain the flaps with the paper clips are oriented precisely as
shown in the figure. Now, pick up the entire configuration and complete the
octahedron by moving the pyramids together as shown by the arrow marked
1. Performing step 2 simply places the flap with the paper clip on it
against a face of the octahedron. In step 3 you wrap the remaining portion
around the octahedron and tuck the last flap (with a paper clip on it) inside
the model. Again, when you become adept at this process you will be able
either to do it without paper clips, or, at least, to slip the paper clips
off just before you perform the last three steps. Actually this is just an
aesthetic consideration, since the paper clips won't be visible on the
completed model.
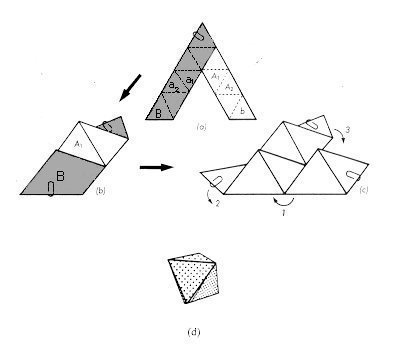
Figure 15
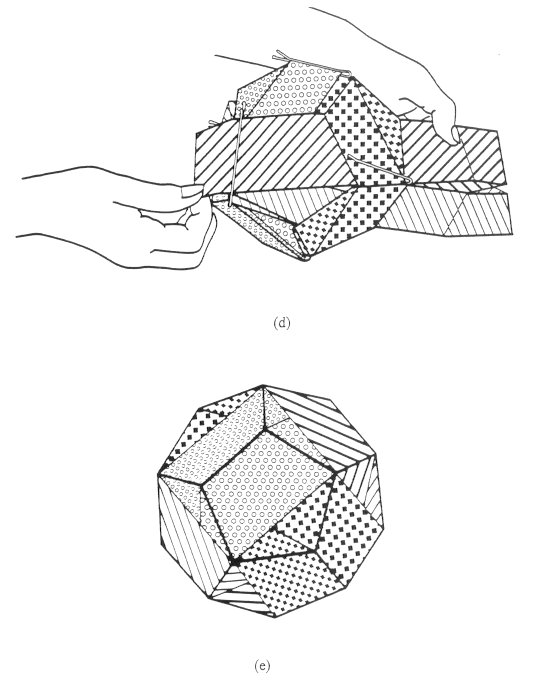
Icosahedron: Label each of triangles on one of the strips with a 1 on the
uncolored side of the tape. Then label the next strip with a 2 on each
of its triangles, the next with a 3 on each of its triangles, the next
with a 4 on each of its triangles, and, finally, the last with a 5 on
each of its triangles.
Now lay the 5 strips out so that they overlap each other precisely as
shown in Figure 16(a), making sure that the center
5 triangles form a shallow cup that points away from you.
You may wish to use some transparent
tape to hold the strips in this position.
Now study the situation carefully before making your next move. You must
bring the 10 ends up so that the part of the strip at the tail of the arrow
goes under the part of the strip at the head of the arrow (this means
"under" as you look down on the diagram, because we are looking at what
will become the inside of the finished model). Half the ends wrap in a
clockwise direction, and the other end of each strip wraps in a
counterclockwise direction. What finally happens is that each strip
overlaps itself at the top of the model. In the intermediate stage it will
look like Figure 16(b).
At this point it may be useful to put a rubber band
(not too tight) around the emerging polyhedron just below the flaps that are
sticking out from the pentagon. Then lift the flaps as indicated by the
arrows in Figure 16(b) and bring them
toward the center so that they tuck in
as shown in Figure 16(c).
The model is completed by first lifting flap 1 and smoothing it into
position. Then you should do the same with flaps 2, 3 and 4. Finally,
flap 5 will tuck into the obvious slot and you will have produced the
model shown in Figure 16(d).
This model is, in the view of the authors, the most difficult of the
9 puzzles to construct and it is not very stable. You might want to put a
couple of lightweight rubber bands around it to prevent it from falling apart
when it is handled.
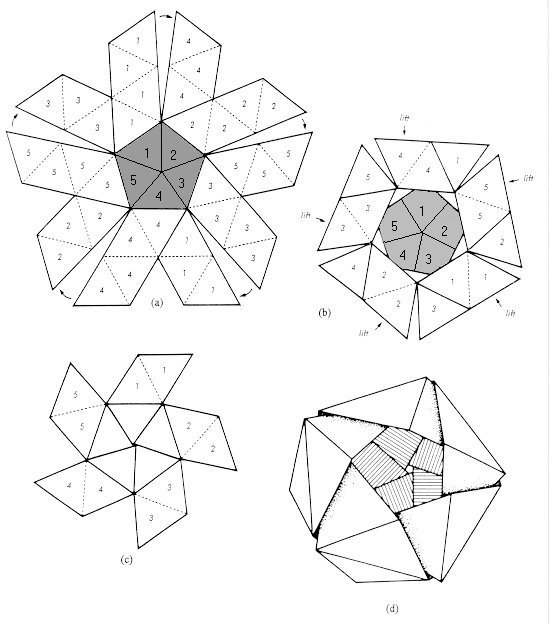
Figure 16
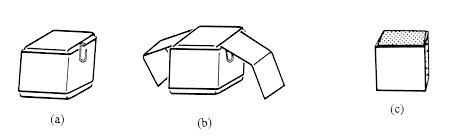
Dodecahedron: Take two of the strips and secure them with a bobby pin
as shown in Figure 17(a)
(with the colored side visible).7
Then make a bracelet out of each of the strips in such a way that
(a) four sections of each strip overlap, and
(b) the strip that is under on one side of the bracelet is over on the
other side. (This will be true for both strips.)
Use another bobby pin to hold all four thicknesses of tape together on the
edge that is opposite the one already secured with a bobby pin.
Repeat the steps above with another pair of strips. You will then have two
identical bracelet-like arrangements. Slip one inside the other one as
illustrated in Figure 17(b), so that
it looks like a dodecahedron with
triangular holes on four of its faces.
Next take the last two strips and cross them precisely as you did in
Figure 17(a)
(to do otherwise would destroy some of the symmetry); then secure them
with a bobby pin. Carefully put two of the loose ends (either the top two
or the bottom two) through the top hole and pull them out the other side so
that the bobby pin lands on CD. Then put the other two ends through the
bottom hole and pull them out the other side. Now you can tuck in the loose
flaps, but make certain to reverse the order of the strips - that is,
whichever one was on the bottom at CD should be on the top when you do
the final tucking.
After you have mastered this construction you may wish to try to construct
the model with tricolored faces, shown in Figure 17(e), which illustrates,
rather vividly, exactly how to inscribe the cube symmetrically inside the
dodecahedron. You may also note a similarity between this construction and
the cube of Figure 10.